What is a Macro in Alteryx?
Macro is a collection of tools that are grouped together as a single tool and that can be used as an input tool or data preparation tool in a workflow. Any workflow can be turned into macro just by clicking the input and convert input to macro, but a reusable macro is the one that is actually helpful. (For example, you might have a workflow that calculates monthly scores for your Sales Rep, but that margin depends upon a multiplier(weightage) that gets calculated outside of your workflow.)
Types of Alteryx Macro
There are three types of macros
- Standard Macro
- Batch Macro
- Iterative Macro
For now, Let’s concentrate on standard Alteryx macro and how to create it.
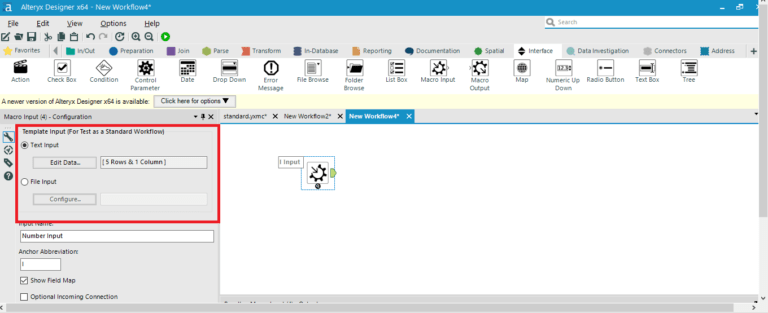
1. There are two ways to create a standard macro in Alteryx designer. One that is shown above and the other by inserting a macro input interface tool and getting the output in macro output.
There are usually two input methods. One for the Text Input and other for the file Input (Excel, SQL, etc.). The Input tool can be defined with an abbreviation and the tool can be named.

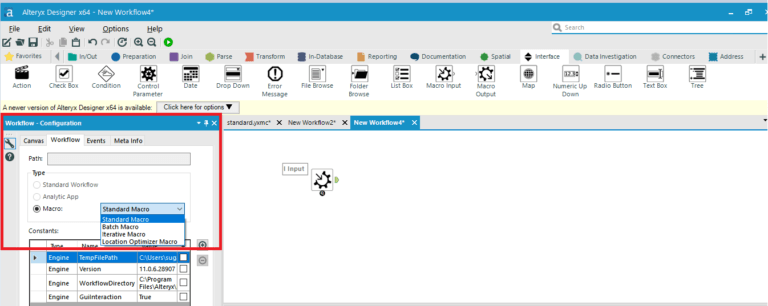
2. Verify that you now have a macro by clicking on the canvas and navigating to the Workflow pane. You should be able to see that the Type of workflow is a Standard Macro.

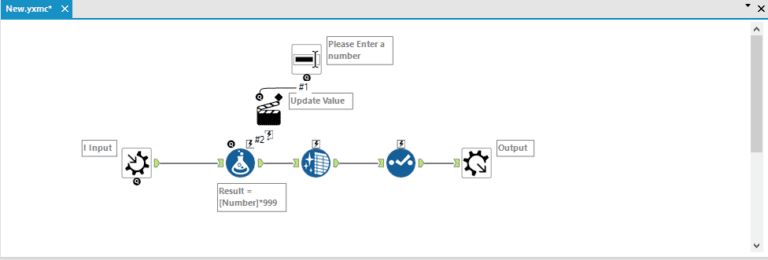
3. Prepare your workflow and then add a macro output at the end of your workflow.

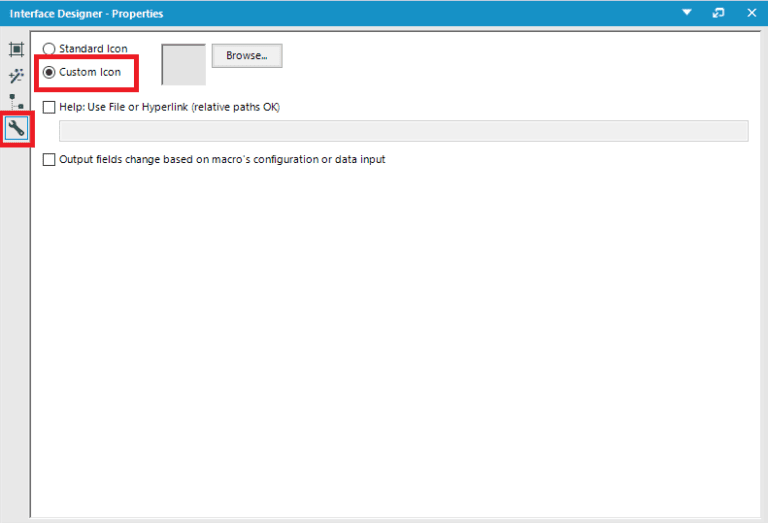
4. Save your workflow with .ymxc file extension. You can customize the macro Icon by clicking (Ctrl+Alt+D) the interface Alteryx designer – Properties

5. Open a new workflow and then right click to insert a macro. We have used our macro to insert a multiplier value (that comes out of the data) to calculate the monthly margin.

You can also save and share a macro for future use. A macro can be saved with a unique name to a specific location. In Alteryx designer, you can create a macro repository mapped to a location on your computer or network, easily save macros and use them in a workflow.
To save a macro:
1. Click File > Save As.
2. Locate a folder on your computer or network where you save macros.
3. Type a unique name for the macro and click Save.
To share workflows that uses custom macros, you need to export the workflow to ensure that all workflow dependencies, including the macro, are saved with the workflow. For this, the workflow must include a relative path to the macro.
To create a macro repository,
1. Go to Options > User Settings > Edit User Settings > Macros.
2. Click +
3. In Category Name, type a name. The default name is Macros.
4. Click ![]() to browse to the location where you save macros on your computer or a network.
to browse to the location where you save macros on your computer or a network.
Sub-folders in a search path cannot be added individually if their parent folder already exists in the Macros repository.
To set a default repository location:
1. Click the repository search path in the list.
2. Click Set as Default. An asterisk (*) displays next to the default repository.
Use cases for standard macros
Standard Macros are applicable when you want to to re-use part of a workflow or you want to add some level of interaction within a workflow. Standard Macros can be as simple as a repeatable data parsing process all the way to a macro enabling publishing of a data source.
Want to know more about our Alteryx consulting services? Get in touch with us here.


