You can now combine, shape and clean different data sources even in Crosstab Database Union using Tableau Prep.
Crosstab is the process of merging data from scattered multiple sources in a concise format for the ease of reporting. And union is a method of combining data by appending rows of one table onto another table. For Crosstab Database Union in Tableau, you need not trust anyone else but the Tableau experts. Tableau dashboards have always changed the way you view data and we will help you scrounge up disparate data, analyze it, identify trends and transform it into something very digestible using Tableau Prep.
State of the union
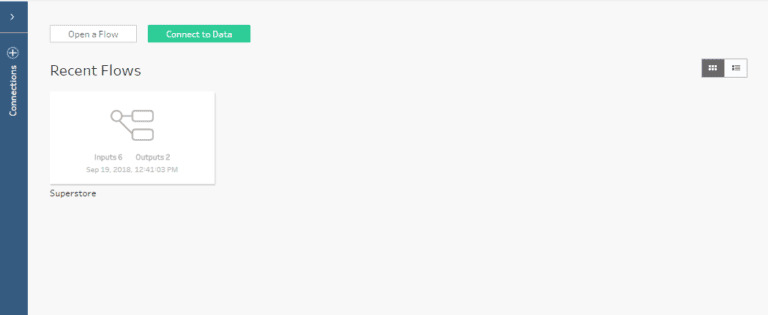
For you to create a Crosstab Database Union in Tableau, let us take you through a step by step visual Tableau user guide:
- Click on the Tableau Prep software and a window will open in the Tableau dashboard as shown below.
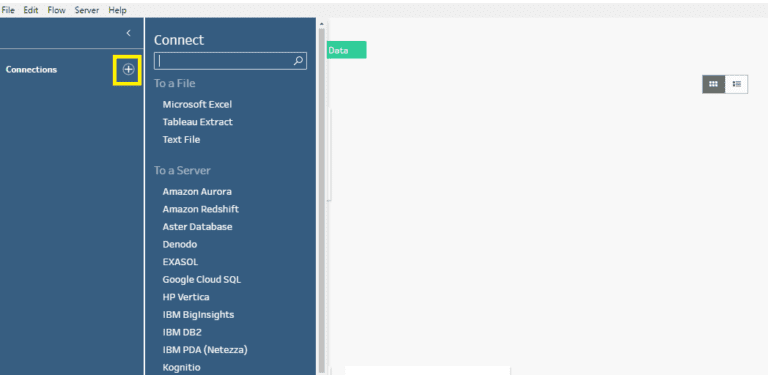
- To add files, simply click on the plus icon next to anyone of the data sources.
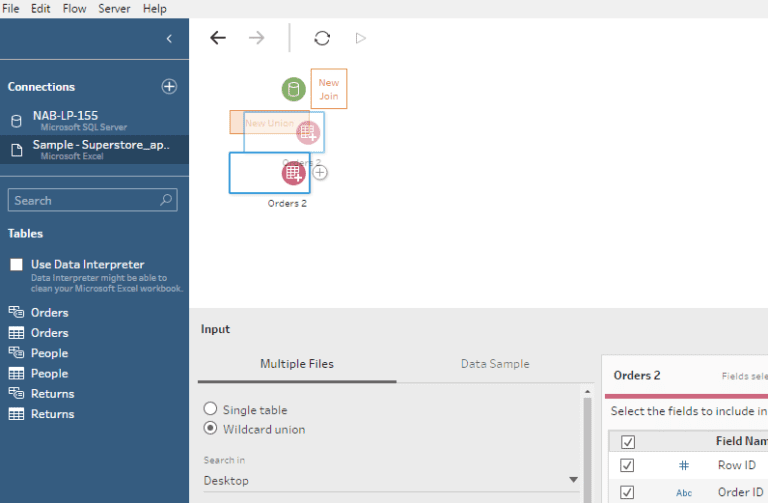
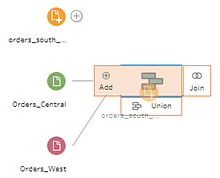
- After you have added at least two tables/files to the flow pane, select and drag a related table to the other table, until you see the New Union option. This is shown below in the Tableau dashboard.
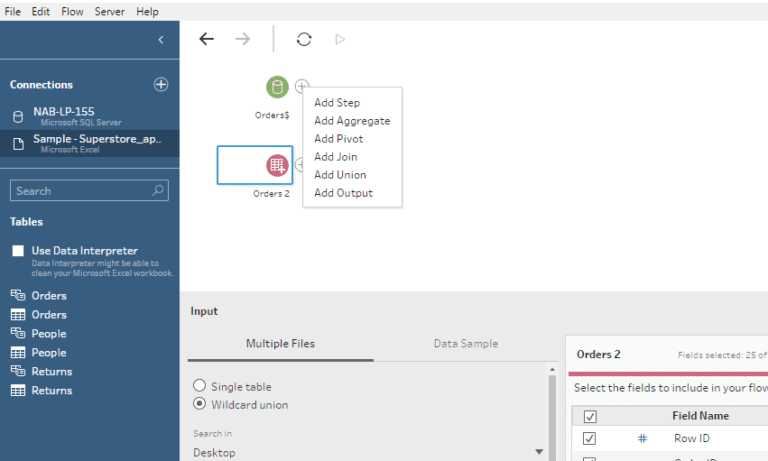
- You can also click the “+” icon and select Add Union from the menu. A new union step is added in the Flow pane, and in the Profile pane updates to show the union profile.
-
Add additional tables/files to the union by dragging tables toward the union tables until you see the Add option.
- In the union profile, review the metadata about the Crosstab Database Union in Tableau.
- If you want to change the default Crosstab Database Union, use the following criteria to find the files or sheets you want to include in the union:
- Search in-Select the directory to use to search for files. Then select the ‘Include subfolders’ check box to include files in the sub-directory of the parent folder.
- Files-Select whether to include or exclude the files that match the wildcard search criteria.
- Matching Pattern (xxx*)-Enter a wildcard search pattern to find files that have those characters in the file name. For example, if you enter ord* all files that include the file name are returned. Leave this field blank to include all the files in the specified directory.
- To use wildcard search to union files:
- Click the Add connection button and under Connect, click Text File for .csv files or Microsoft Excel for Excel files, and then select a file to open.
- In the Input pane, select the Multiple Files tab, and then select Wildcard union.
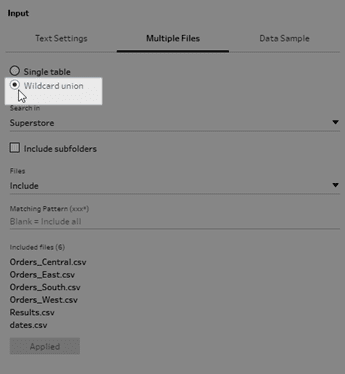
- The example below shows a wildcard union using a matching pattern. The plus sign on the file icon on the Orders Central Input step in the Flow pane indicates that this step includes a wildcard union. The files in the union are listed under included files.
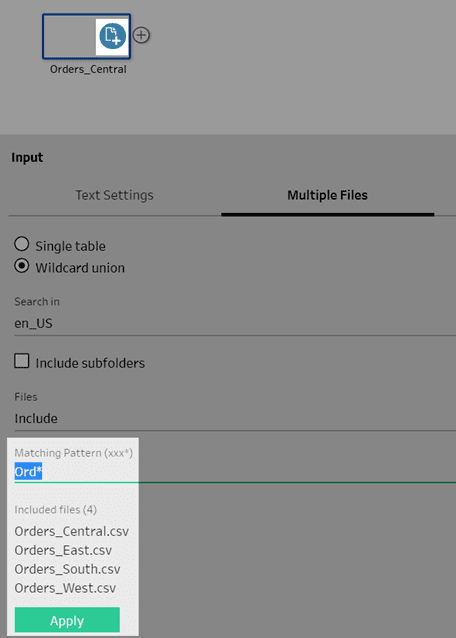
- Use the search, file and matching pattern options to find the files that you want to union.
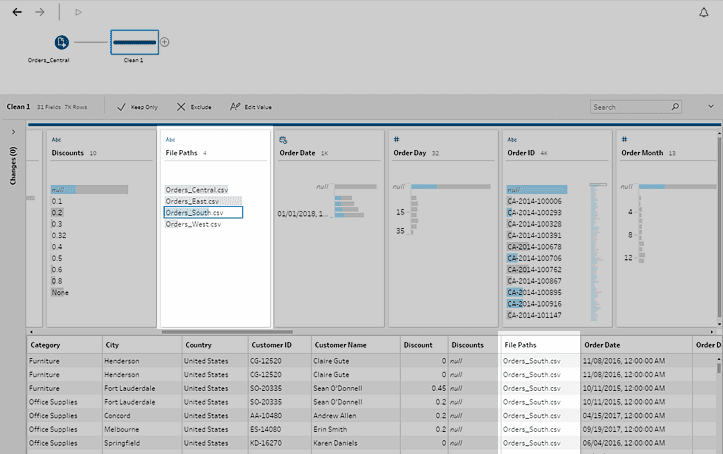
- Click Apply to union the files.When you add a new step to the flow, you can see all the files added to the data set in the File Paths field in the Profile pane. This shows which file the data has come from. This field is added automatically.
Victory! You have successfully created a Crosstab Union Database in Tableau using Tableau Prep. As Tableau experts, we assure you that you have not only changed the way you think about your data but also harnessed its limitless power to let your analytics flow towards your targeted business goals.
That’s it for now but we’ll be back with more information soon on Tableau dashboards and if you have any questions or want to learn more about how Tableau Prep can help you master your data. Contact us.


